Home of Tone Blog
Filter by
All
'54 to '78 spec Vintage Stratocaster wiring harness kit
11828-111LTD
11828-121LTD
15 Second Gear Demo
15secondgeardemo
1611828-121LTD
1950 Broadcaster
1950 Broadcaster pickups
1963 Jazz Bass wiring
1970s Fender Jazzmaster
1970s Jazzmaster
1976 Tone Bender
1976 Tone Bender Fuzz for sale
1977 Fender
1977 Fender Jazzmaster
3 way harness
3 way strat wiring harness
3 way strat wiring kit
3 way strat wiring loom
3 way stratocaster wiring
335
335 harness
335 wiring harness
4 way switching
4 way Tele install
4 way telecaster
4 way wiring
46/58
46/58 jazzmaster
46/58 pickups
5 way strat wiring
50s style les paul wiring
50s style wiring
50s style wiring SG
50s wiring
60s Guitar
60s guitar strap
60s guitar straps
A5 Signature +
A5 Signature Plus
A5 Signature Plus demo
Acoustic
Acoustic Guitar
affordable pedalboard
affordable pedalboards
Ambler Custom Guitars
Ambler Guitars
Ambler Interview
Andy Demos
Andy Martin
Andydemos
Angry Rhubarb Overdrive
Angry Rhubarb Paradynamic Overdrive MKII
Angry Rhubarb pedal
announcement
arcade button kill switch
Archtop
Archtop guitar
archtop project
Ariel Posen
Ariel posen Fade
AVRI Trem
AVRI Trem Review
AVRI Trem UK
AVRI Tremolo Review
AVRI Tremolo UK
AVRI vibrato
baritone
bass guitar kill switch
Bearded Vulture pedal
beginner guitar
Beginners guide to guitar pickups
Benson Amps
benson amps pedals
Benson amps pedals UK
Benson Amps UK
Benson delay
benson fuzz
Benson Ge boost
benson germanium
benson pedals
Benson pedals UK
benson stonk box
Benson ȘTÖRKN B0kš
benson tonebender
best beginner electric guitar
best beginner guitar
Best beginners electric guitar
best way to shield a guitar
Bingley hall
Birmingham
Birmingham guitar show
Blog
Blood Oath
Blood oath demo
Blood Oath Pedal
Blood Oath pedal demo
Blue Nation
Blue Nation band
Blue Nation Music
Bolin Burst pickups
bonamassa
bonamassa broadcaster
bonamassa broadcaster pickups
bonamassa humbuckers
Boutique
Boutique guitar
Boutique Guitar pedals UK
Boutique Guitar UK
boutique guitars
boutique overdrive pedal UK
Boutique overdrive pedals UK
Boutique Pedals UK
Boutique RAT pedal
boutique strat pickups
Boutique Telecaster
Boutique Telecaster for sale
brass guitar slide
brass guitar slides
british blues guitarist
British guitar luthier
british guitar maker
British guitars
british luthier
British made guitar
british made guitars
Bronco bass
Bronco bass harness
Bronco bass loom
bronco bass pickup
bronco bass pickup mod
Bronco bass upgrade
Bronco bass upgrade kit
Bronco bass upgrades
bronco bass wiring
bronco bass wiring harness
Broncomaster
Brono bass loom
budget guitar
Budget strat
Build
Californian guitar company
Chad Jennings
Charity
Charity fundraiser
Charity fundraising
Charity shirt
Charlie Christian Pickup
Charlie Christian Pickup Demo
Charlie Christian Pickup UK
Charlie Christian Pickups UK
choosing guitar pots
choosing the right guitar pot
choosing the right guitar pots
Chris Buck
Chris Buck guitar
Chris Buck guitarist
Chris Buck pedal
Chris Buck pedals
Christmas
Coffee
Coil split 470k resistor mod
Coil split wiring
Coil splitting
Collings 360
Comparing the Fender AVRI
compressor
Compressor pedal
Compressor pedal demo
Cornucopia
Crimson Guitars
CTS 500k push/pull pot
CTS coil split wiring
CTS DPDT pot
CTS Push/Pull
CTS Push/Pull coil split
CTS Push/Pull Pot
CTS Push/Pull wiring
Cts reverse logarthimic pot
CTS reverse taper pot
Custom built guitar UK
Custom guitar
custom guitar build
Custom Guitar Pickups
Custom Guitar Pickups UK
Custom guitars
custom shop
Custom Shop bolin burst pickups
Custom Shop Invader
Custom shop tele
Custom Shop telecaster
Custom Telecaster
Daisy Tempest
DB
Decoupled wiring
Deimel
Deimel Guitar
Deimel Guitars
Deimel Guitarworks
delay pedal
Delonge ES-333 wiring
Delonge ES333 wiring
Delonge ES333 wiring kit
Delonge Starcaster
Delonge Starcaster harness
Delonge starcaster loom
Delonge Starcaster wiring
Delonge Strat
Delonge Strat reissue
Descendant arm
Descendant bridge
Descendant bridge install
Descendant companion bridge
Descendant jaguar bridge
Descendant jazzmaster bridge
Descendant Tremolo
Descendant UK
Descendant vibrato
Descendant vibrato arm
Descendant vibrato arm adjustment
Descendant vibrato maintenance
Descendant vibrato UK
descendant vibrato unit
Diamond Bottleneck
Diamond Bottlenecks
Diamond Bottlenecks dealer
Diamond Bottlenecks slides in stock
Diamond Bottlenecks slides in stock UK
Diamond Bottlenecks Slides UK
Diamond Bottlenecks UK Dealer
Diamond Bottlenecks Ultimate
Diamond guitar slides
Diamond slides
Dipswitch Demo
Dipswitch Demos
Drilling a les Paul for CTS pots
drive pedal
Dudley guitar shop
Dudley guitar tech
Dudley record shop
Duel Blade
Duncan Designed
Dweezil Zappa Guitars
Dweezil Zappa McNelly
Dylan Talks Tone
Eastman Guitars
Eastman T49D
Eastman T49D wiring
Eastman T49D/v
Eastman T49D/v pickups
Eastman T49D/v project
Eastman T49D/v wiring
effects pedal build class
Effects pedal build workshop
Effects pedal building class
Effects pedal show
Effects Pedals UK
Elder Sign Forge
electric guitar kill switch
electric guitar kill switches
Electric Lightning
entry level guitar
EP
EP Drive
EP Drive pedal
EP Drive pedal UK
Ep Drive V3
EP Drive V3 pedal
EP-3 preamp pedal
EP-3 preamp pedal UK
EP3 preamp
Epiphone coronet reissue
Epiphone coronet wiring harness
Epiphone coronet wiring loom
Epiphone Les Paul pot hole drilling
Epiphone Les Paul pot hole size
Eric Johnson Strat harness
Eric Johnson Stratocaster harness
Eric Johnson Stratocaster wiring loom
Eric Johnson wiring harnesses
Eric Johnson wiring loom
Ernie Ball Cutlass
Ernie Ball Cutlass HSS
Ervin Somogyi
ES-175D
ES-335
ES335 harness
ET200
etwood guitar strap
etwood guitar straps
EVH kill switch
EVH wolfgang kill switch
Feature
Fender
Fender AVRI
Fender AVRI trem
Fender AVRI vibrato
Fender Jaguar bridge
Fender Jazzmaster
Fender Jazzmaster bridge
Fender Jazzmaster Parts UK
Fender Jazzmaster trem
Fender Jazzmaster vibrato
fender neck plate
Fender Tele
Fender Telecaster
Fender Tom Delonge
Fender Tom Delonge Strat
Fender Tom DeLonge strat wiring
Fender Tom DeLonge Stratocaster wiring
Fifty
filterton Pickups UK
Filtertron
Firebird Harness
fitting a les paul wiring harness
Fitting a pre-wired guitar harness
Fitting a strat harness
fitting a Stratocaster wiring harness
Fitting CTS pots into Epiphone Les Paul
Fitting Guide
Florian Schneider
Florian Schneider interview
Fresh
fundraiser
fundraising
Furry burrito fuzz pedal
Furry Burrito UK
Fuzz
fuzz jazzmaster
Fuzz pedal
FUZZMASTER
FX EXPO
FX EXPO 2020
FXEXPO
FXEXPO2020
G&H guitar cable plugs
G&H plugs
Gabriel Strings
Gabriel Tenorio
Gabriel Tenorio String Co
Gabriel Tenorio String company
Gabriel Tenorio Strings
gabriel Tenorio strings UK
Gabriel Tenorio Strings UK Dealer
Gareth Hardwick
Gear Demo
gearnerds
Geartalk
gearwire
Geeking out with James Gascoigne
Gibson
Gibson 50s wiring
Gibson ES335
Gibson Firebird Harness
Gibson Les Paul Custom
Gibson SG harness
Gibson SG wiring
Give em hell son
glass guitar slide
glass slide
Glass slide guitars
glass slides
Godspeed You! Black Emperor
Gold Foil
gold foil pickups
Good beginner electric guitar
Good beginner guitar
Grainger Guitars
GraphTech jazzmaster saddles
Gravity
Gravity 003
Gravity 003 UK
Gravity Guitar Pick
Gravity Guitar picks
Gravity Guitar Picks UK
Gravity Guitar Picks UK dealer
Gravity Picks
gravity picks 003
Gravity Picks for sale
Gravity Picks Home of Tone
gravity picks UK
Gravity Picks UK dealer
Gravty
Green Sofa Chronicles
Ground bug
Ground Control Audio
Ground Control Audio demo
Ground Control Audio Demos
Ground Control Audio Interview
Ground Control Audio Locust
Ground Control Audio Locust V1.5
Ground Control Audio Noodles
Ground Control Audio Noodles pedal
Ground control audio pedal
Ground Control Audio Pedals
Ground Control Audio Serpens
Ground Control Audio TSUKUYOMI
Ground Control Audio UK
Ground Control Pedals
Ground Control Pedals UK
guide
Guitar
Guitar & Bass
Guitar & Bass Mag
Guitar & Bass Magazine
Guitar Blog
guitar body
Guitar Build
Guitar Builder
guitar cables
Guitar design
Guitar Exhibition
Guitar harness
guitar jack
guitar jack socket
guitar jack socket fitting
guitar jack socket install guide
Guitar kill switch
guitar kill switches
guitar kill switches UK
guitar lead
guitar leads
Guitar Mag
Guitar magazine
guitar maker
Guitar maker interview
Guitar makers
Guitar making
guitar parts
guitar pedal
Guitar pedal shop UK
Guitar pedal shops UK
guitar pedal UK
guitar pedalboard cables
guitar pedals
Guitar pedals UK
Guitar Pick
Guitar Picks
Guitar Pickup
Guitar Pickups
Guitar Pickups UK
guitar pot casing ground wires
Guitar pot grounding
guitar relic wax
Guitar Restoration
guitar shielding
guitar shop dudley
Guitar shop stourbridge
guitar shop stourbridge dudley
Guitar shops stourbridge
Guitar Show
Guitar Show 2016
Guitar Show 2018
Guitar Show 2019
Guitar Show UK
guitar show west midlands
Guitar Shows
guitar shows in west midlands
guitar shows in west midlands 2022
guitar shows UK
Guitar Slide
guitar slides
guitar soldering
Guitar strap
Guitar strap UK
Guitar Straps
Guitar T-Shirts
Guitar Talk
guitar tech
guitar tech stourbridge
Guitar wiring
Guitar wiring boards
Guitar Wiring Harness
Guitar Wiring Harness UK
Guitar Wiring Harnesses
Guitar Wiring Harnesses UK
guitar wiring install
Guitar wiring loom
guitar wiring mods
Guitar YouTube
Guitar YouTube Channel
guitarist interview
Guitarists Anonymous
Guitarshow
H535
Halesowen guitar tech
handmade
Handmade Filterton Pickups
Handmade Guitar
handmade guitar cable
handmade guitar cables
handmade guitar lead
handmade guitar leads
Handmade guitar strap
handmade guitar strap UK
Handmade guitar straps
Handmade guitar UK
handmade guitars
Handmade Guitars UK
handmade offset guitar
handmade offset guitars
handmade pedalboard
handmade pedalboards
Handmade pickups
handmade RATpedal
Handmade Tele for sale
Handmade Telecaster
Handwired Harness
Handwound
Handwound Strings
Harrison Vaughan
Heritage
Heritage Guitars
Heritage H535
high quality guitar strap
high quality leather guitar strap
high quality leather guitar straps
Hipshot bridge
Hipshot tuners
Holy Gra
Holy Grail
Holy Grail 2018
Holy Grail Guitar Show
Holy Grail Guitar Show Berlin
Holy Grail Guitar Show coverage
Holy Grail Show
Holy Grail show coverage
Home of Tone
Home of Tone Blog
Home of Tone bronco harness
Home of Tone bronco loom
Home of tone customer service
Home of Tone Doxa
Home of Tone Fifty
Home of Tone Fuzzmaster
Home of Tone guitar strap
Home of Tone guitar straps
Home of Tone harness
Home of Tone Harnesses
Home of Tone Jazzmaster
Home of Tone Merch
Home of Tone News
Home of Tone pre-Wired
Home of Tone pre-wired harness
Home of Tone record of the week
Home of Tone reviews
Home of Tone shirt
Home of Tone Shirts
Home of Tone T-Shirts
Home of Tone TV
Home of Tone UFO shirt
Home of Tone Walsh Guitar
Home of Tone Walsh Guitars
Home of Tone wiring
HOT Fifty
How do I fit a pre-wired harness
How do I fit a strat harness
how do I fit a stratocaster harness
how do I solder a jack socket
how do I wire a guitar jack socket
how do you wire a jazz bass
how to
How to apply foil shielding to guitar correctly
how to fit a guitar harness
how to fit a les paul harness
How to fit a pre-wired harness
how to fit a SG harness
how to fit a strat harness
how to fit tele harness
how to foil shield a guitar
How to ground wires to guitar pot casing
How to guide
How to install 4 way wiring
how to make a jazzmaster loom
How to make a les paul harness
how to re wire a les paul
how to re wire a les paul toggle switch
how to re-wire a les paul
how to re-wire a les paul switch
How to safely drill the holes for pots in a Les Paul
How to solder a guitar jack
how to solder a jack socket
how to solder guitar pot casings
How to solder guitar pots
how to solder pot casings
how to wire a 3 way telecaster
how to wire a guitar jack socket
how to wire a jack socket
how to wire a jazz bass
how to wire a Jazzbass
how to wire a jazzmaster
how to wire a jazzmaster loom
how to wire a les paul
How to wire a Les Paul harness
how to wire a Les paul switch
how to wire a les paul toggle switch
how to wire a telecaster
how to wire les paul pots
how to wire up left handed guitar pot
how to wire up reverse taper guitar pots
HSH strat wiring
HSS Strat wiring
Humbucker
Humbucker coil splitting
Humbuckers
Ian McWee
Independent les paul volume
Independent les paul wiring
Indra Guitars
installing 4 way wiring
Instrument lead
Instrument leads
Interview
Is it worth upgrading my guitar wiring
Jackson Brooksby demos
Jackson Brooksby guitar
Jackson Brooksby guitar demos
Jackson Brooksby YouTube
jacquard guitar straps
jacquard weave
jacquard weave guitar straps
Jaguar bridge
Jaguar Trem
Jaguar Tremolo
jaguar vibrato
James Gascoigne
James Gascoigne Interview
James' Home of Tone
James' Home of Tone Blog
James' Home of Tone customer service
James' Home of Tone interview
James' Home of Tone open day
James' Home of Tone reviews
Japanese Guitar
jazz 3
Jazz Bass
Jazz Bass harness
Jazz bass loom
Jazz Bass wiring
Jazz Bass wiring harness
Jazz Bass wiring loom
jazz III
Jazz III pick
Jazz III picks
Jazzmaster
Jazzmaster bridg
Jazzmaster bridge
Jazzmaster harness
Jazzmaster humbuckers
Jazzmaster loom
Jazzmaster P90s
Jazzmaster Parts UK
Jazzmaster pickups
Jazzmaster pickups UK
Jazzmaster Project
Jazzmaster single coils
Jazzmaster Trem
Jazzmaster tremolo
jazzmaster vibrato
Jazzmaster vibrato unit
Jazzmaster wiring
jazzmaster with fuzz
jazzmaster with fuzz circuit
Jennings
Jennings Catalina
Jennings Catalina demo
Jennings Guitar
Jennings Guitar demo
Jennings guitar for sale UK
Jennings Guitar UK
Jennings Guitars
Jennings Guitars demo
Jennings Guitars interview
Jennings Guitars UK
Jennings Guitars UK dealer
Jennings Navigator
Jennings Navigator for sale
Jennings Tele
Jennings Telecaster
Jennings Tradesman
Jennings UK
Jennings UK dealer
Jennings Voyager
Jennings Voyager Deluxe
Jennings Voyager Deluxe demo
Jennings Voyager demo
Jennings Voyager UK
Jensen Capacitors
Jersey Girl Guitars
Jersey Girl Homemade Guitars
Jghg
JM
JM90
Joe Bonamassa
Joe Bonamassa broadcaster pickups
joe bonamassa burst
Joe Bonamassa pickups
John Ambler
John Ambler Guitars
John ambler interview
John Cordy
John Cordy Guitar
John Cordy YouTube
John Mayer strat
John mayer strat pickups
John Nathan Cordy
Josh Smith
Kalamazoo
Kay
Kay ET200
Kay Guitar
Kay Guitars
Kempton Park guitar show 2018
Khruangbin
KTS Jazzmaster Saddles
KTS Saddles
Kurt Vile
Laura Marling
Lead Crystal
lead crystal slide
leather guitar strap
leather guitar straps
left handed audio taper pots
left handed guitar
left handed guitar pot
left handed guitar pots
Left handed guitar wiring
lefty guitar pot
lefty guitar pots
Leila Sidi
Leila Sidi Tunatone
Les Paul
Les Paul 50s wiring
les paul burst
Les Paul Custom
Les Paul Harness
Les Paul Harnesses
Les Paul long shaft or short shaft
Les Paul long shaft pots
Les Paul pots
les paul short shaft pots
les paul switch
les paul toggle
Les Paul wiring
les paul wiring guide
Les Paul wiring harness
Les Paul wiring install
Les Paul wiring pots
lida machine
lida machine demo
Live at the colony
Live Music
Loaded for bear
loaded for bear audio
loaded for bear audio cable
loaded for bear audio UK
Loaded for bear cable
loaded for bear cables
loaded for bear guitar lead
loaded for bear guitar leads
loaded for bear instrument cables
loaded for bear instrument leads
Local Music
lockdown quiz!
Locust Pedal
London Guitar Show
London Guitar Show 2018
London Guitar Shows
London International Guitar Show 2018
long shaft or short shaft pots
Lost Soul Leather
Lost Soul Leather guitar straps
Lost Soul Leather straps
Lovalet
Lovalet Crossroad guitar
Lovalet Guitar
Lovalet Nomad
Lovalet Nomad guitar
Lovalet Nomad Jr
luthier
luthier interview
luthier UK
Made in the UK
Magazine Feature
making a jazzmaster loom
making ground connections to pot casing
marcus d'luxe
marcus d'luxe pedalboard
Marcus Darby
Marcusdluxe
Marcusdluxe pedalboard
Marshall
Marshall Amp
Martin
Mastery & Descendant vibratos
Mastery Bridge
Mastery OMV
Mastery OMV Feature
Mastery Tremolo
Mastery vibrato
Mayer strat pickups
Mcnellt T-bar
McNelly
McNelly 46/58
McNelly 46/58 pickups
McNelly A5 Signature Plus
McNelly A5 Signature Plus demo
McNelly Bass Pickups
McNelly Bliss
McNelly Bliss humbucker
McNelly Bliss humbuckers
Mcnelly bronco
McNelly bronco bass pickup
McNelly Broncomaster pickup
McNelly Chaplain
McNelly Chaplain humbucker
McNelly Charlie Christian
McNelly charlie christian humbucker
McNelly Charlie Christian Pickup
McNelly Charlie Christian Pickup demo
McNelly Charlie Christian Soapbar
McNelly Cornucopia
McNelly Cornucopia demo
McNelly Cornucopia humbucker
McNelly Cornucopia pickups
McNelly custom pickups
McNelly Demo
McNelly Demo Videos
McNelly Duckling
McNelly Duckling Demo
mcNelly duckling pickup
McNelly Duckling pickup demo
McNelly firebird
McNelly humbucker
McNelly Jazzmaster
McNelly Jazzmaster pickup
McNelly Jazzmaster Pickups
McNelly JM90
McNelly Nostalgia
McNelly Nostalgia Demo
McNelly Nostalgia pickup
McNelly Nostalgia Pickups
McNelly Nostalgia Review
McNelly P90
McNelly P90 Soapbar
McNelly Pickup
McNelly Pickup Demo
McNelly Pickup Nostalgia Review
McNelly Pickup Review
McNelly Pickup UK
McNelly Pickups
McNelly Pickups 46/58
McNelly Pickups Demo
McNelly Pickups for sale
McNelly pickups interview
McNelly Pickups Review
McNelly Pickups Sparkletron
McNelly Pickups Stagger Swagger
McNelly Pickups UK
McNelly Pickups videos
McNelly Review
McNelly Silvercaster
McNelly Soapbar
McNelly soapbar stagger swagger
McNelly Sparkletron
McNelly Sparkletron demo
McNelly Stagger Swagger
McNelly Stagger Swagger Demo
McNelly Stagger Swagger pickups
McNelly Stagger Swagger V2
McNelly Strat pickups
McNelly T-Bar pickups
McNelly UK
McNelly Wild Range Demo
Meet the Maker
meet the maker interviews
Meet the makers
Meet the Player
Merch
Michael James Adams
Michael Watts
Mid Century
Mid-Century design
Mike Wiltshire interview
Mikey Demus
Mikey Demus interview
millimetric
millimetric guitars
Millimetric instruments
Millimetric Instruments UK
millimetric interview
Millimetric t-shirt
Millimetric UK dealer
Mind Charity
Mini Jazzmaster
Minus the bear
Minus the bear highly refined pirates
modding squier bronco
Modern strat wiring
Monty's Guitars wax
Monty's montypress
Monty's montypresso
montypresso
montypresso relic wax
montypresso wax
Montys Guitars
Montys relic wax
Mother Mary Co
Mother Mary co strap UK
Mother Mary co straps
mother mary company
Mother mary Company straps UK
Mother Mary straps
Mother Mary Straps UK
Music
Music Blog
Music Scene
Mustang Bridge
Mustang Bridge mod
My GUitar Stuff
Nachural business awards
NAMM 2019
New Bingley hall
New guitar
New Music
new pedal
New Pedal Day
new pedal release
New Stock
news
NGD
Nicolai Schorr
Nicolai Schorr guitars
Nicolai Schorr interview
Nirvana Tone
Nostalgia Pickup
Nostalgia Pickups
NPD
NRG effects
NRG effects pedals
NRG effects workshop
NRG fuzz
NRG fuzzer
NRG pedals
Octave Fuzz
Odessa
Odessa Deabeat
Odessa DeadBeat
Odessa deadbeat baritone
Odessa Degenerate
Odessa Guitar
odessa guitar review
Odessa Guitar UK
Odessa Guitars
Odessa Guitars deadbeat
Odessa Guitars Interview
Odessa Guitars Review
Odessa Guitars UK
Odessa Guitars website
Of Kings & Captains
of kings and captains
Offset Corner
Offset Fender
Offset Guitar
Offset guitar bridge
offset guitar bridges
offset guitar UK
Offset guitar vibrato
Offset Guitars
Offset guitars UK
Oil City Pickups
OKAC
Olympic White
Open Day
Original tone bender for sale
Original tone bender fuzz
Overdrive
Overdrive Pedal
P90
P90 Pickup
P90 Pickups
P90 sized gold foil
P90 Sized Gold Foils
PAF
PAF pickups
Pancake
Pancake Jazzmaster
paper in oil
paper in oil capacitors
parallel treble bleed
Partscaster
Partscaster for sale
Partscaster for sale UK
patch cables
Peak District
pedal
pedal board
pedal brands
pedal demo
pedal demos
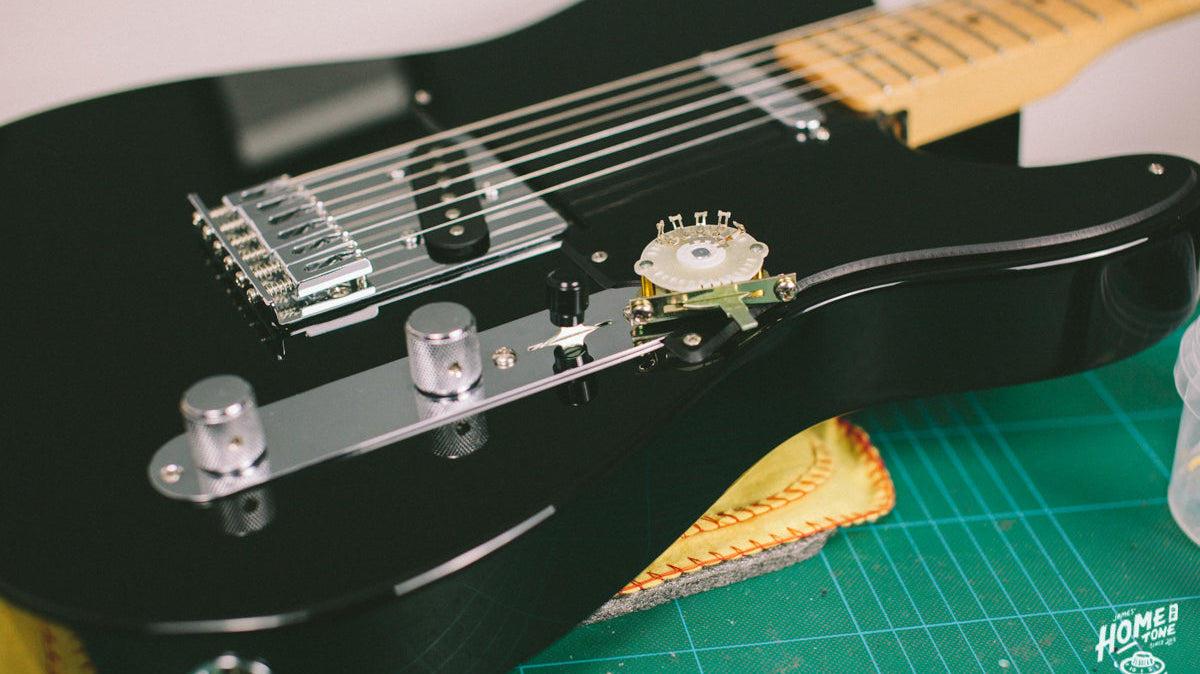
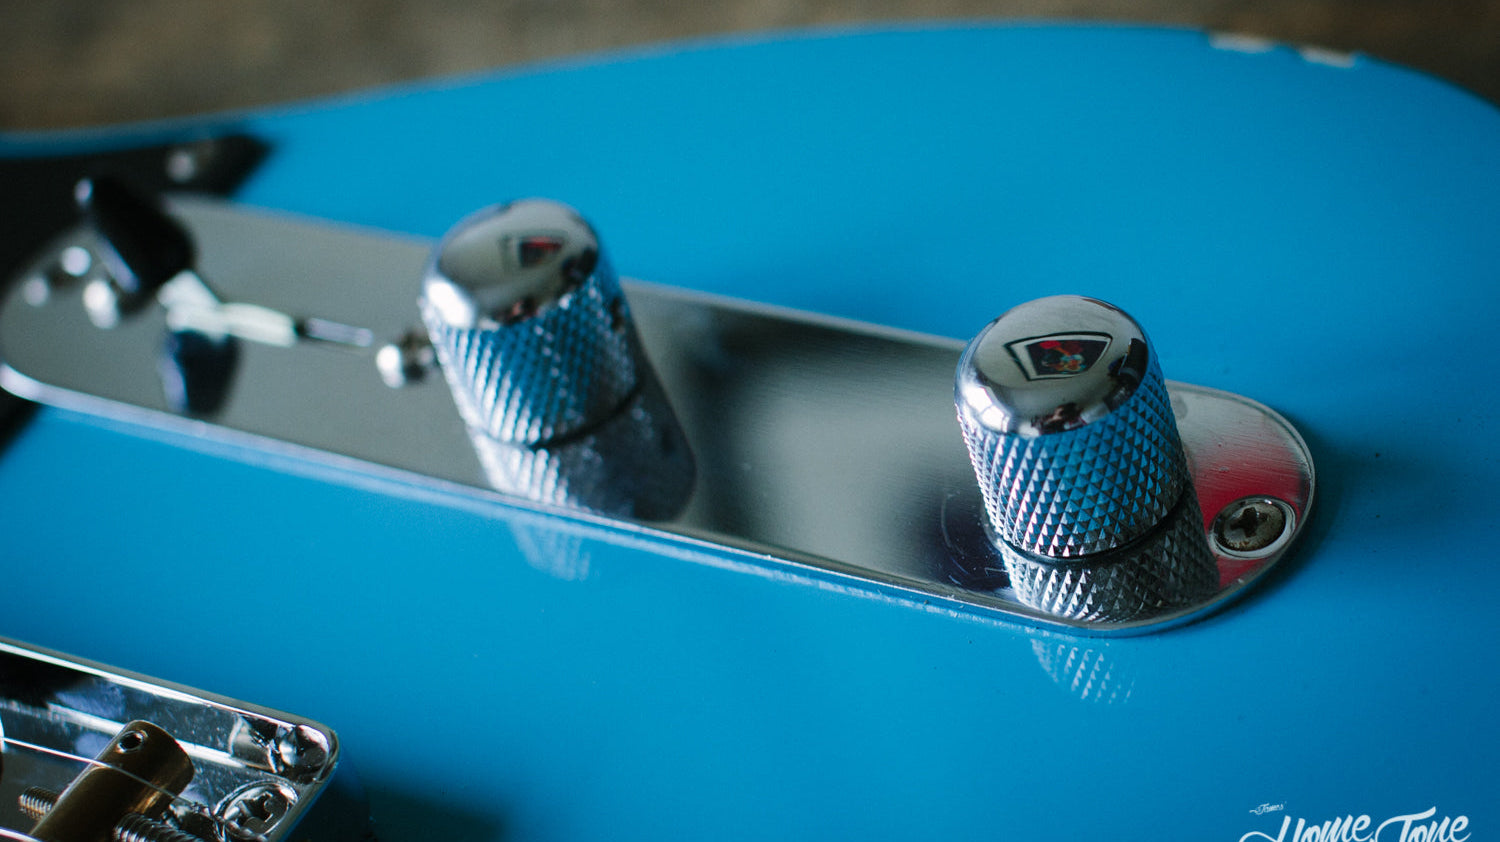
How to Guide - Fitting a 4-way Pre-Wired Harness to a Telecaster!
—
James P Gascoigne
Tagged:
4 way Tele install
4 way telecaster
Fitting a pre-wired guitar harness
Home of Tone Blog
Home of Tone harness
Home of Tone Harnesses
Home of Tone pre-Wired
Home of Tone Pre-Wired Harness
How do I fit a pre-wired harness
how to fit tele harness
How to guide
How to install 4 way wiring
installing 4 way wiring
Mcnellt T-bar
McNelly T-Bar pickups
Pre-Wired
Pre-Wired Guitar harnesses
tele
tele wiring
telecaster
telecaster wiring
A very long overdue 'how to guide' post here today looking at the step by step process of installing one of our Signature Series 4 way Telecaster wiring harnesses along with a fresh set of pickups! The 4 way harness takes your traditional 3 pickup positions of neck only, neck and bridge parallel and bridge only, but adds a 4th position where the neck and bridge are in series providing a beefier tone. It requires a little more work than a standard 3 way, but the results are great!
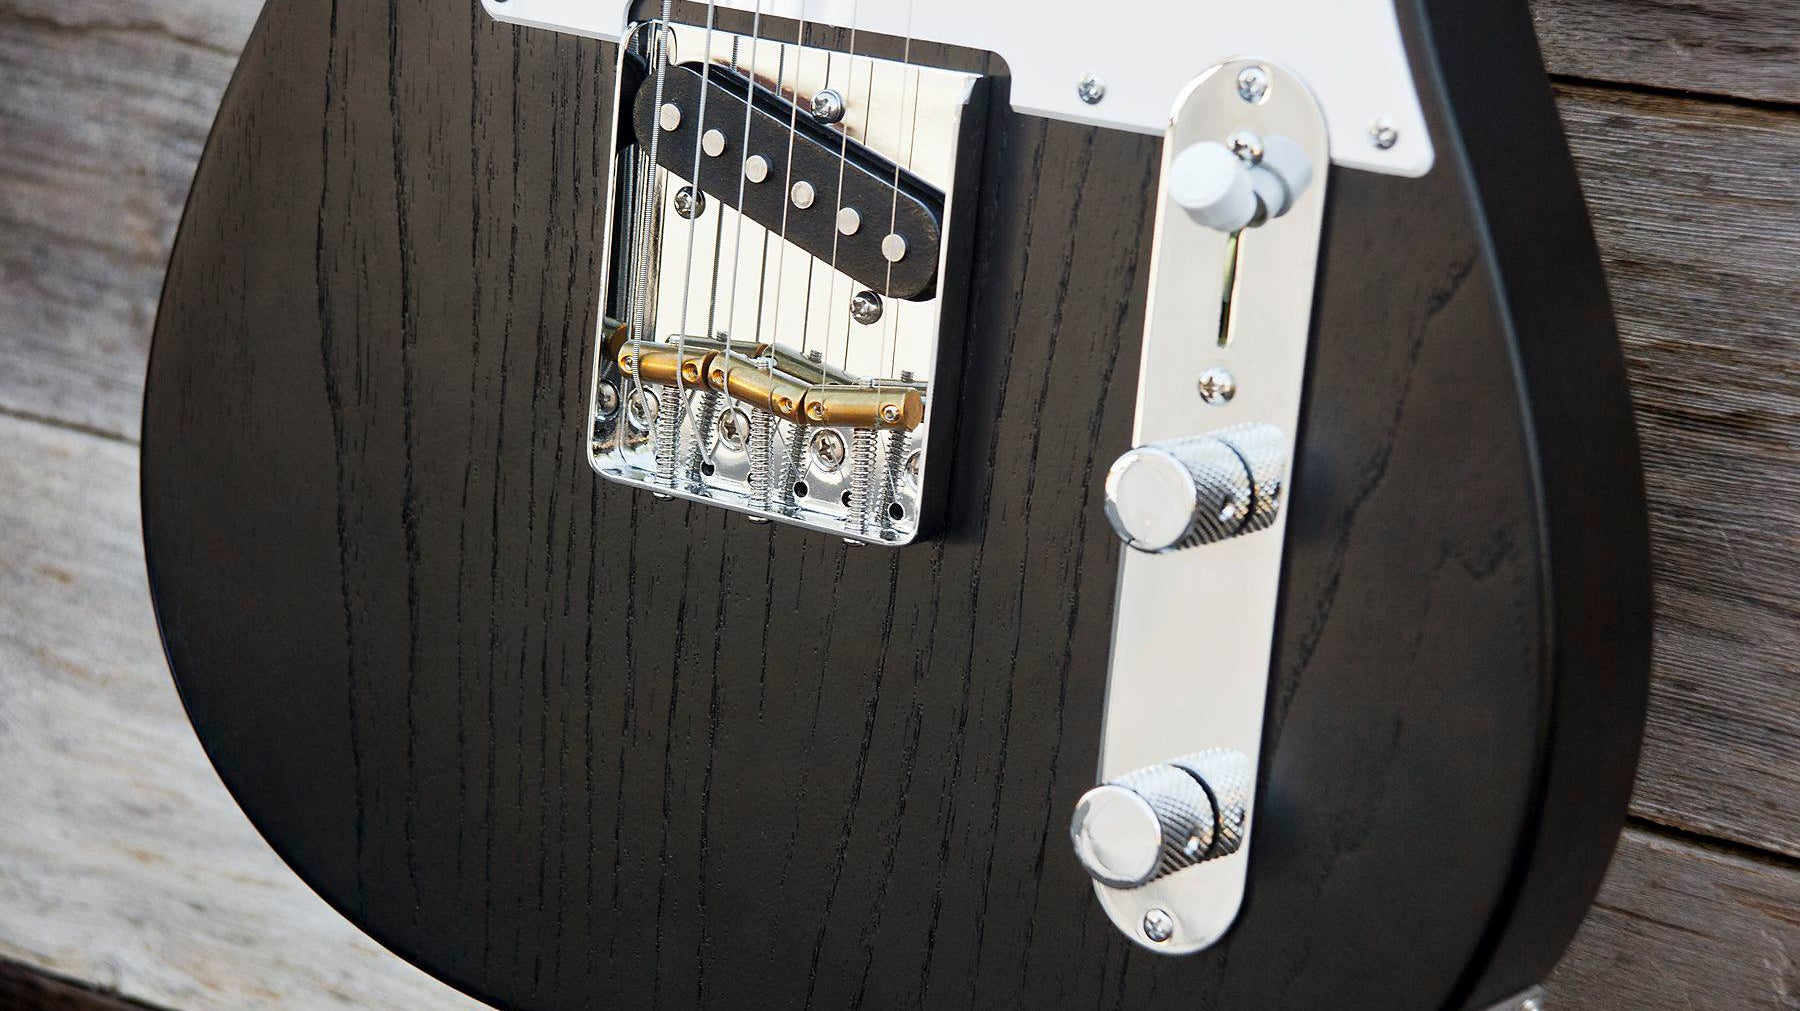
How to guide - What do I need to do to my Tele neck pickup for it to work with 4 way switching?
—
James P Gascoigne
4 way switching for a Tele is a fantastic way to retain the existing, classic 3 pickup positions of neck pickup only, bridge pickup only and neck & bridge pickups in parallel. But if you've fancied achieving a slightly beefier, almost humbucker esq sound too but didn't want to compromise the rest of your Tele sounds as they are, 4 way switching offers you an additional position: Neck & bridge pickups in series! Putting the two pickups in series as opposed to parallel creates a louder and chunkier sound and it can be great fun to have this available to you without compromising the traditional 3 position tele sounds.
Jennings Guitars Announce 'Navigator' - Their homage to an icon
—
James P Gascoigne
After months of work, I was really pleased to see Jennings announce their latest guitar, The Navigator last week. I was lucky enough to be sent quite a few teaser photos whilst Chad & Devin were working on this model, and you could definitely tell they weren't content with simply making another 'Tele'. Sure, it would be very important to be true to the design, the reason why the Tele works as well as it does after all! But do so with their own stamp, as well as an interesting ethos behind why they wanted to approach a classic design as opposed to another unique shape to their lineup.
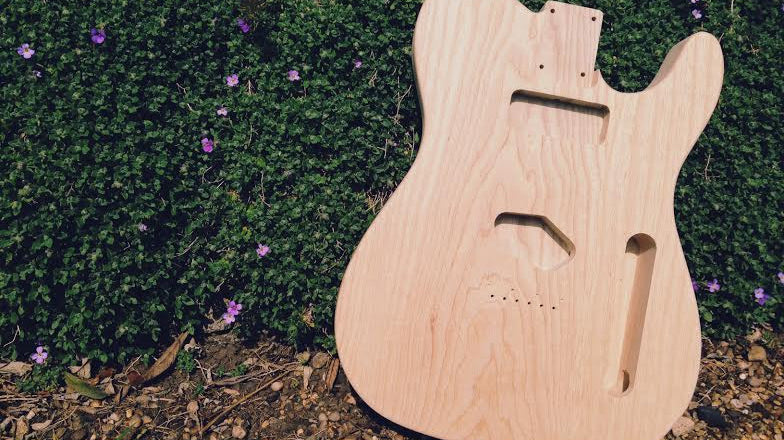
The latest 'Fifty - The fun begins
—
James P Gascoigne
With the first 'fifty fresh off the work bench, demo'd and showcased at the Guitar Show, I decided to get moving on the second one! Home of Tone build #3,...