So you've wired up your pots and they're ready to go, now it's time to pre-wire your new switch. There's a couple ways I like to do this, but first up I'm going to look at the more traditional style braided two conductor wire.
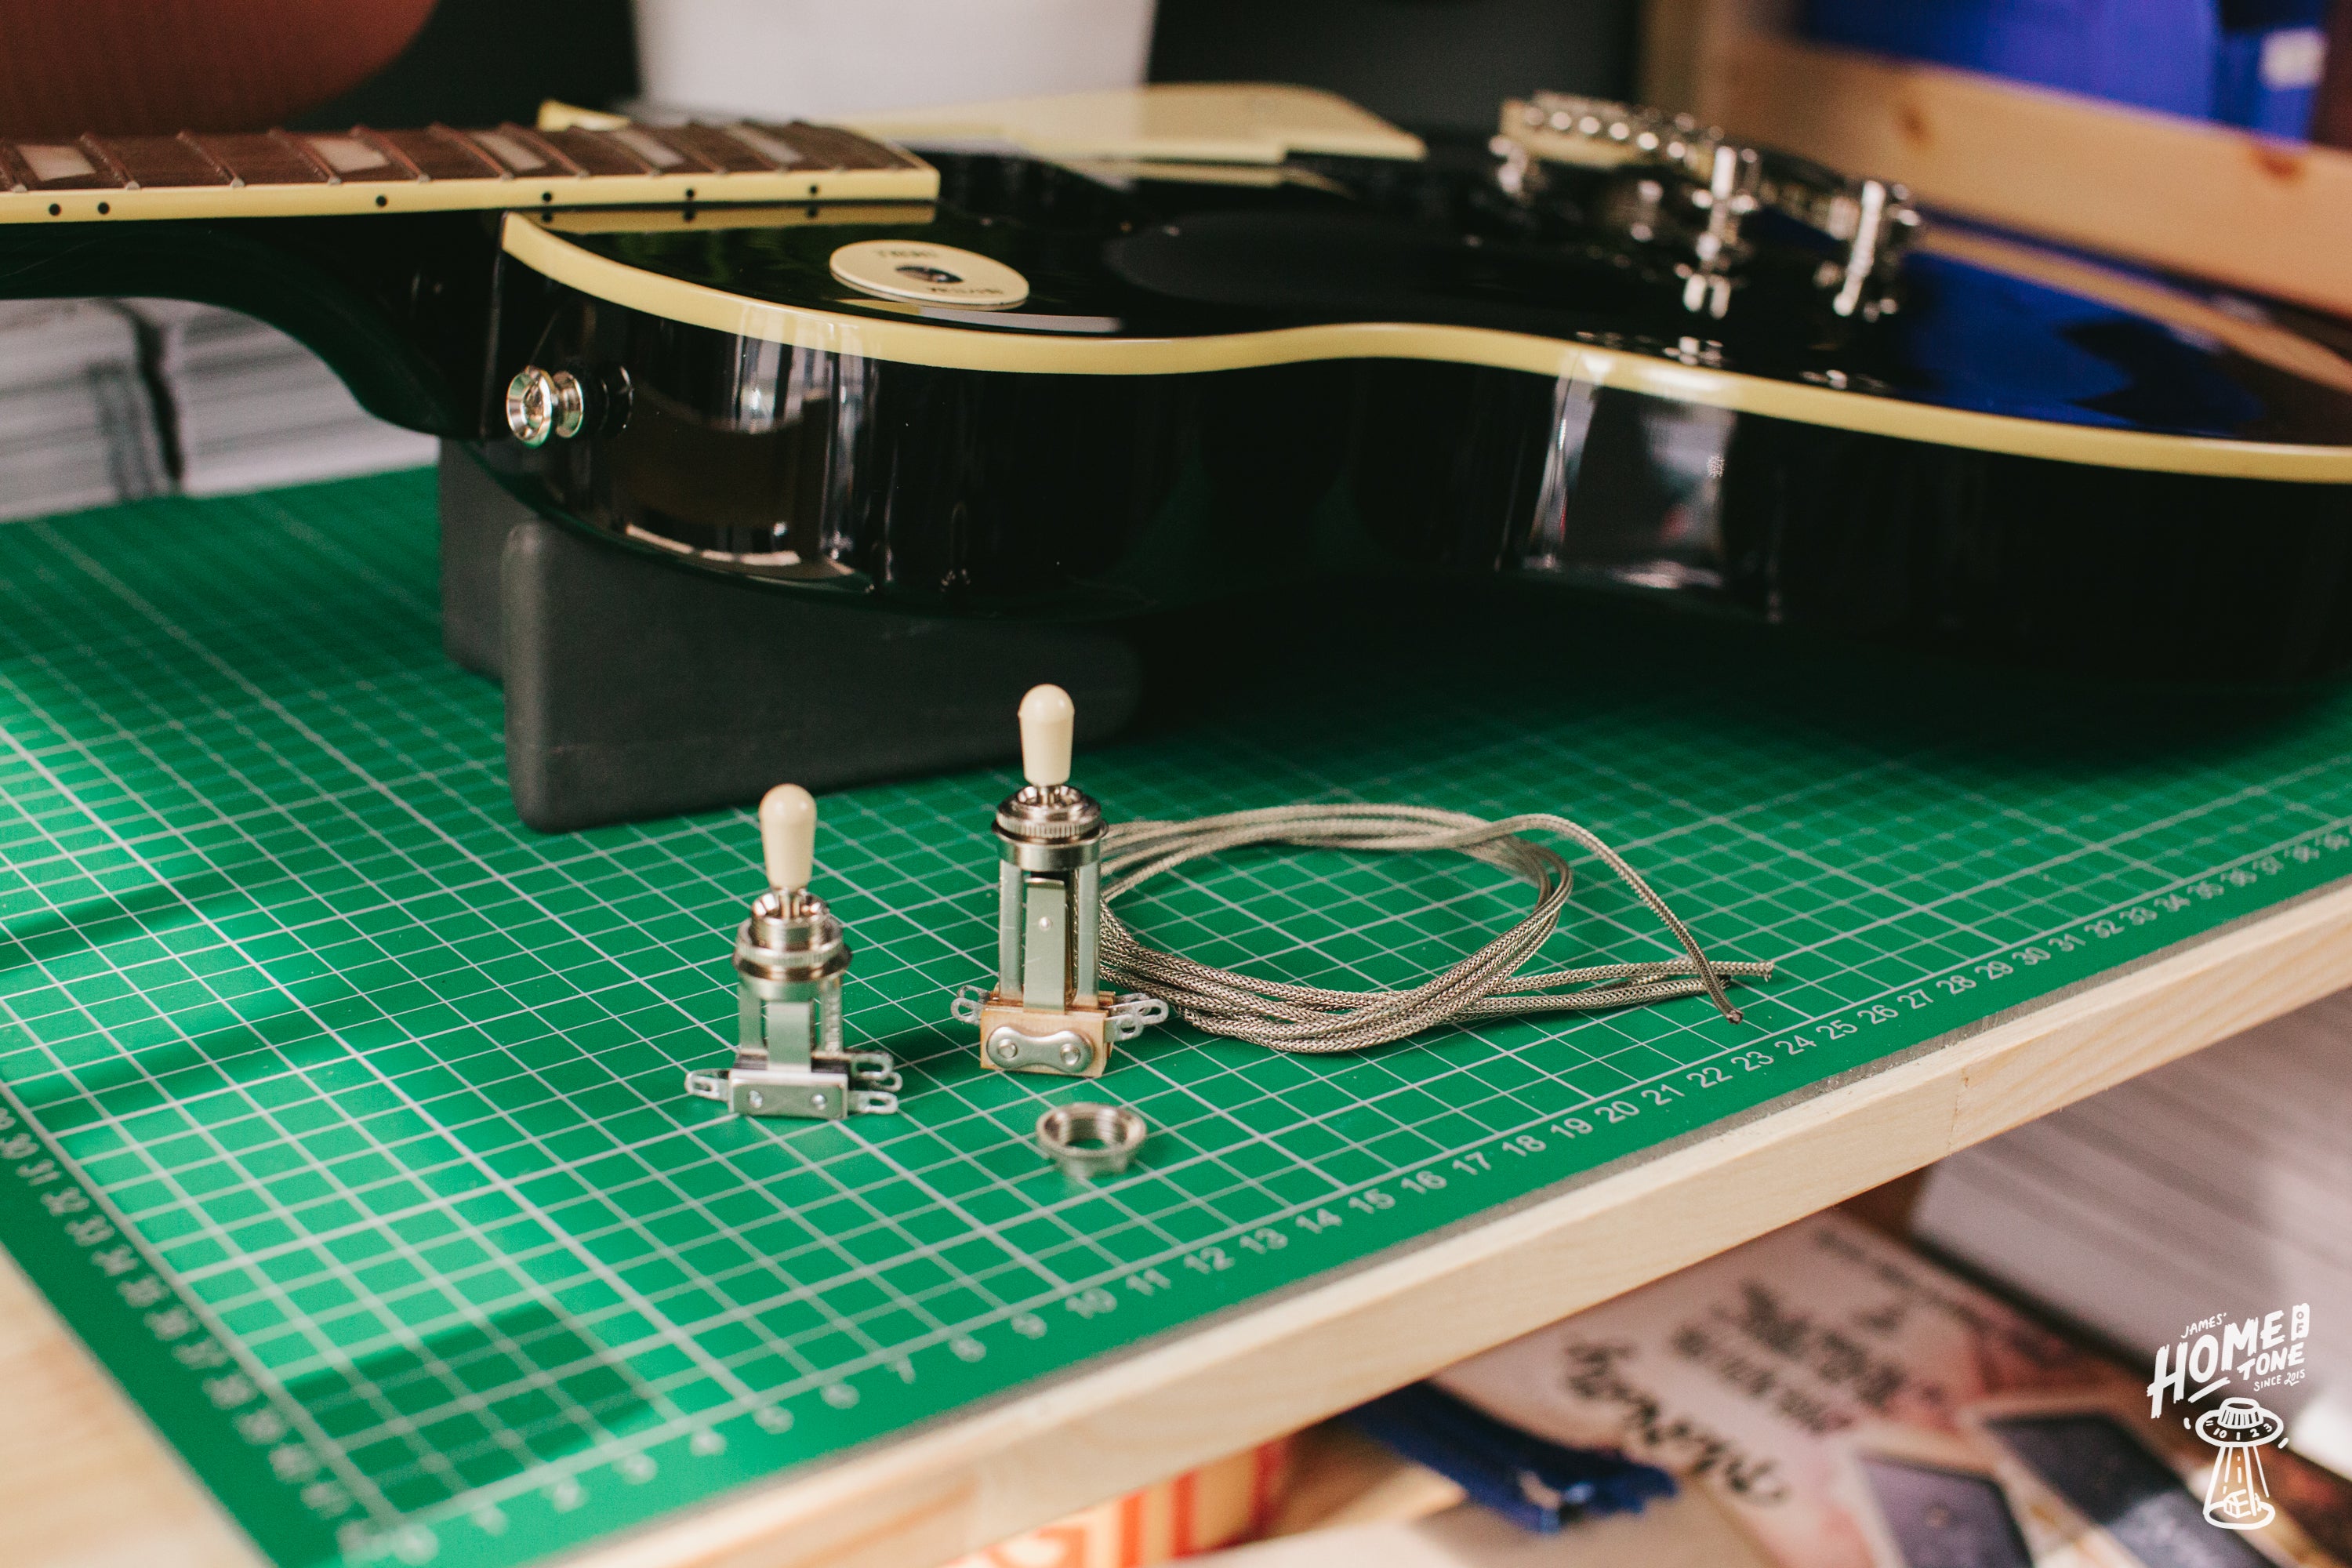
Before we dive in, I wanted to highlight the different types of Switchcraft 3 way toggle switch that are available and suit Les Pauls. There are the traditional 'long frame' switches or the slightly more recent creation of the 'short frame' version. Both operate and are wired up the very same way, but are different sizes and feature different mounting thread lengths so felt it is worth discussing both and hopefully help you in deciding which would suit your guitar or install best.
First up, the long frame switch. These measure around 38mm in terms of depth within the cavity, and will fit the majority of Les Pauls. But is best to double check by measuring the depth of your switch cavity first. The Epiphone Les Paul I am currently working on for these guides has a cavity depth of 42mm so this switch would fit on this occasion. But if you have a Les Paul Special, a model which has a shallower cavity usually, or another variation/brand of LP with a shallower cavity you'll need a short frame switch. 

The main problem with the long frame switch though is that due to the bigger frame of the switch itself, squeezing it into the cavity when it is all wired up can be a bit tight. But also, the mounting thread depth is incredibly shallow meaning it won't be a direct fit through the guitar's top without additional parts. You can buy extended knurled nuts, which have an extended thread length helping you fit this style of switch to most Les Pauls. A cheap additional part, but something you'll need extra and is demonstrated in the photos above.

The short frame switch, aside from it's overall size difference (measuring only 24mm deep) makes life a bit easier when pushing all the cables through the channeling and fitting the switch into the cavity. But it also has a much longer mounting thread length as demonstrated above, removing the need for the additional extended threaded nut. Saving you a little bit of cash, but mainly saving you any hassle during install. This switch was an easy, direct fit into this Epiphone, fitting in the cavity comfortably and the body top thickness was absolutely fine to fit the standard mounting nut. Overall, I just find the short frame version the obvious choice for wiring up a Les Paul. But hopefully this info helps you decide which is right for you.
I'm soldering a short frame switch in this demonstration, but similar methods will apply if you're soldering a long frame version. Looking at the switch from the above photo angle, closest to us on the outer edges are the lugs for the 'neck' and 'bridge' pickup selection wires, and centrally to those you have the chunkier lug which is the main ground connection. On the other side of the switch, you'll find two lugs which need to be attached together and act as the 'common' live, which the jack output wire is attached to.
The first things I prep are the lugs, so starting with those two pickup selection lugs either side of the ground lug. Gently bend those away from the middle, this just gives you a little extra working space and keeps the live connections nice and separate.
Then on the other side, you can either just bend those two common lugs to be touching, or my preferred method is to use my small needle nose pliers and form a nice solid connection which I find easier and neater when attaching the wire. Like so...


Now, onto the first solder connection. I tend to start with the ground wire first. For this, I am using some 20swg tinned copper bus wire, but you could use some coated/insulated wire too if you have that to hand. 
If you look into the control cavity on your Les Paul, you may notice that the wire channel leading away from it is close to the guitar's top, where the switch mounts up to. So keep this in mind when positioning your wire connections, you'll thank yourself for doing so when you come to fit the switch all wired up into the guitar.
I angle my ground wire parallel to the switch, then solder the wire in place. Switchcraft switches usually come supplied pre-tinned, so you shouldn't need to pre-tin the switch here. You're ready to make your solder connection straight away. Warm the joint, and flow some solder on to secure the wire. Make sure you don't move the connection too quickly as it could form a bad/cold joint, allow it to cool before moving.

Now keeping in mind where the wire channel is positioned, I bend the ground wire to suit, leave around 5/6cm of wire length and cut it. 

We're going to be starting our three braided wire connections now.
Cutting the wire lengths, you'll need a section of wire around 45cm long, and two sections of wire around 35cm long. These lengths should give you a little working length and won't be too tight when installing. One is longer because this one goes all the way to you jack socket, whereas the other two go to your volume pots. 
Braided wire is quite nice to work with because you can easily push back the braided part to reveal the cloth covered central core wire. Then the cloth portion also pushes back easily to reveal the central stranded core. So I start with the jack socket output wire (the longer piece), push back a portion of the braid, push back a little of the black cloth covering and reveal the stranded core. As this wire is stranded, we ideally need to pre-tin the wire. So here I simply place my iron on the wire, warm it a fraction and apply a small amount of solder to pre-tin as required. 
This is now ready to attach to my prepped common lug on the switch. Place the tinned central core wire through the lug, heat the joint and make your solder connection. When completed and cooled down, push the black cloth covering back up to the connection to ensure the wire is nicely insulated as it passes towards the switch body and you're good to go!

Onto your two volume pot signal wire connections now. The process is essentially identical to those noted above. Prep your braided wire & pre tin the central core.
Then one by one, attach to either side of the out lugs on the switch.

Flip over and repeat!

With the wire connections all now made, we can prep the wires to make our ground connection which is done in a really neat way.
Remembering back to the body cavity and positioning of the wire channel, you can shape the wires to suit like I have above.
You will find having some masking tape to hand quite useful for the next step. I also use a short length of 6.4mm 2:1 heat shrink which I will first feed the three output wires through. Don't shrink it yet though!
This is a useful stage to mark our wires so we know which is which upon install. 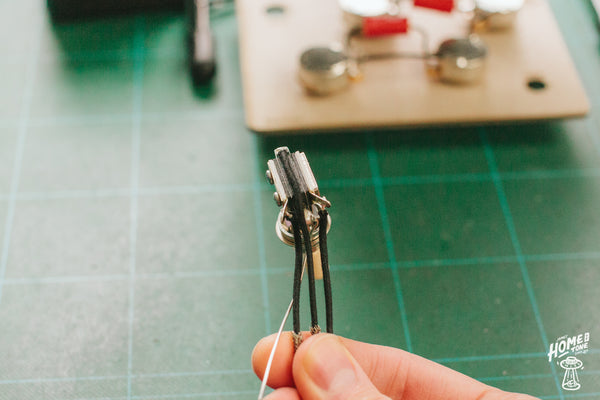
Looking at the switch from this angle, the central wire that is coming from our common lugs will be connected to the jack. So pop some tape around the end of that wire and mark it for the jack. For a right handed Les Paul, the wire attached to the switch on the right hand side here is our neck pickup volume wire, so mark that accordingly. For a right handed Les Paul, this now means the wire attached to the switch on the left hand side here is for our bridge pickup volume pot, so mark that accordingly. Which should leave you with each wire marked up making your install of the switch much easier!
Now let's get it grounded! We've already prepped the wire positioning, so simply pinch the three wires together and wrap the bare tinned ground bus wire tightly around the three braided output/signal wires like so...

Then warm up the joint and solder the wire to the braided wires. Try and get a nice even coverage of solder across each of the three braided wires where it meets the ground wire.

Onto the heat shrink! I personally use this not just to neaten things up, but on some Les Pauls there is an opening of the wire channeling through the body right under the neck pickup cavity. A length of heat shrink here shields the braided ground section of the wire as it passes through this section, so just a bit of shielding really whilst the wires could be near the pickup baseplate/mounting.
So slide the heat shrink tubing up over the ground joint we've just made and you're good to go!
The switch is now all wired up and ready to be installed! Hope this helps with your own wiring work.
Don't forget, I stock all of the components featured in this article so if you are planning to re-wire your switch and will be using this article to help along the way, please do consider supporting my store and ordering the parts from the website. Really appreciate your support!
James

Comments
This is a really well done tutorial. Thanks.