
In the previous posts for this series we've looked at the right tools for the job, selected the right parts, making the harness and making any alterations to the Les Paul to prepare for installing imperial spec parts such as widening the holes for the pots to mount through. With all of that in mind, it's about time we got to installing it all right?
If you missed the previous posts they are all linked to on the origin post HERE

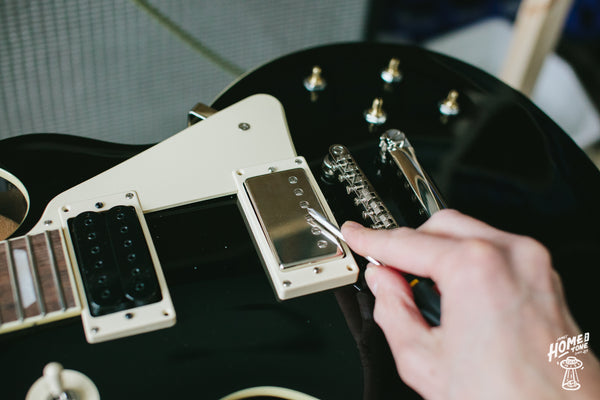
I start things off with feeding the switch wires through the control cavity and mounting up the switch. 


You may have already noted the benefit of a couple of steps we took during the loom making and parts selection process. Feeding the wires at an awkward angle whilst also trying to squeeze the switch into the cavity can be fiddly but prepping the wires the way we did whilst making it as well as the short frame switch really do make this part nice and simple.
Now turn the guitar over and secure the switch to the body with the mounting nut. 
For this you can use the multi spanner like I am using in the photo below, or some needle nose pliers if that's all you have to hand. Just make sure you pop a cloth on the body to protect the finish if it's the latter. I also recommend supporting the switch with your other hand, so you can line it up nicely to the poker chip direction. Tightening the switch nut without doing this will likely cause the switch to spin/rotate as you do so putting strain on the wires in the cavity and ultimately make the switch angle wonky! Keep it nice and straight and tighten.
With the switch mounted up, I turn the guitar back over and turn attention to soldering up the jack socket. To keep things out of the way whilst working in the cavity, using a cloth to protect the finish I just tape down the wires we're not currently working with until they're needed. Another step where our prep will have helped here, due to the labelled switch wires! So separate the jack wire and we're ready to make a start with the first of our solder connections.
The wire I cut was perhaps a little too long (better than running to short though of course) so first up I plan the route I want it to follow through the cavity and also allow for a little give in the length as you definitely don't wires super tight. That makes for a frustrating time when trying to work on the guitar in the future. So allow for some give and cut to the desired length.
It's also worth considering shielding this wire with some heat shrink or tubing, as this wire will be passing through the full control cavity and that outer braiding is the wire's ground meaning if it touched a live connection it could cause you frustrations when it's all installed. So use this time to pop some shielding over the braid. I've just used heat shrink on this occasion. 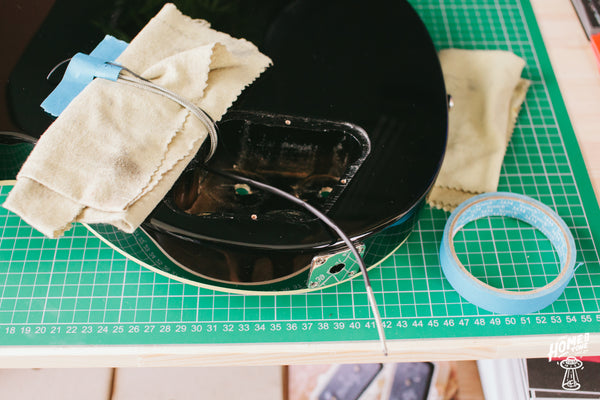
Onto the soldering iron! I'll be pre-tinning the solder tabs on the jack firstly, placing the iron on the lug to warm the joint then flowing a little solder on it to make for a solid solder joint when I come to attach the wires.

Then with the jack wire, you need to solder the central core wire to the 'tip' lug of the jack for your signal, and the braided portion of the outer wire to the ground/sleeve lug. A neat way to do this I find is to pinch some of the braid and pull it away from the wire, then cut this off neatly. The photo below is a nice example of how much braid I remove.

I then push back the cloth insulation of the central core and pre-tin the stranded wire
Place the tinned central core wire through your tip/hot jack lug and make your solder joint. Again, warm the connection a little and flow some solder on so it takes to the surface cleanly. Pre-tinning should help make this easier. If it's your first time wiring up a jack socket and not quite sure which lug is which, HERE is an article about identifying them easily whether you have Pure Tone jack like I have here, or a traditional Switchcraft version.

Moving onto the ground connection via the outer braided portion of the wire and the remaining lug on the jack socket. So push back the braid and position it on the ground lug. Place you iron on the braid and lug to warm the joint and make your solder connection.

With the jack now soldered, you can mount it up! Grab your socket and again, support the jack from inside the cavity so it doesn't spin and put strain on the wires and tighten it up.
I then move onto the pickups. I am not using the original Epiphone pickups, these have quick connections attached and a slightly different from normal colour coding system so I want to touch on that separately. But I've mainly decided that I want to demonstrate how to wire up two other main types of pickup wires for this demonstration traditional braided 2 conductor pickup wire and 4 conductor pickup wire. Which I will get onto specifically in a moment, but first it's time to remove the previous pickups from the mounting rings and swap them over to the pickups being installed to the guitar this time around. This is a simple Philips head screwdriver task on this guitar, don't worry about pickup heights at this stage, just mount them up for no.
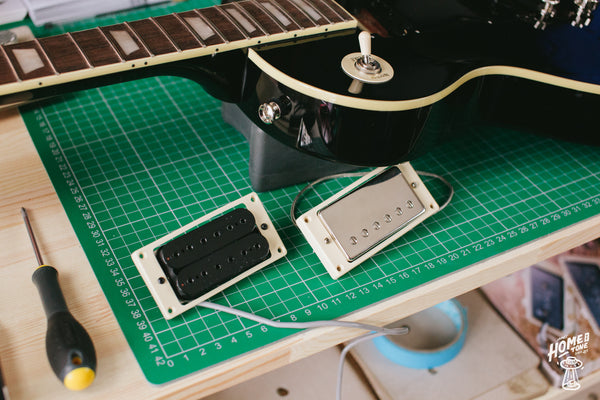
As you can also see, the pickup mounting rings are angled, so be sure to mount the pickup in the right orientation for it's given position.
I install the neck pickup first, mainly because of the wire channeling in the body, it's easier when the bridge pickup isn't already mounted. So feed the wires through and with that done, attach the pickup mounting ring screws. I tend to only fit a couple of screws at this stage to hold it captive. After everything is installed, tested etc then I finish with the others. Just saves a bit of time if you by chance need to remove any components whilst trouble shooting should you encounter an issue along the way.

If both of your pickup wires have no determinable differences, you could also label one of the pickup wires so you know which wire is which once the pickups are installed and you come to solder everything in place. On this occasion I didn't need to do this as the neck pickup is 4 conductor wire, and the bridge 2 conductor so the differences were clear, but if they both are the same style marking the one wire may well help you upon soldering everything in place.
Then onto mounting up the bridge pickup. Same process as above here!

With the pickups secured by some (or all) mounting ring screws, turn the LP back over and we can begin plotting the wiring.
I now move onto prepping the harness by pre-tinning the pot casing ready for the various ground connnections. This is the same process as we covered in the harness making 'how-to' guide, but if you skipped those and jumped straight to this article then I'll give a quick run down to bring you up to speed. Pre-tinning helps make a more solid (and somewhat easier) solder connection, it particularly helps with back of pot casings which I know a lot of people get frustrated about when wiring up a guitar. With a clean and tinned soldering iron tip, simply place the iron on the pot casing in the area where you plan to make a connection, and allow the surface to warm up a little. Then flow a small amount of solder which you should see take to the surface nice and cleanly providing the surface is warmed. You can add a very small amount if it's a simple single wire connection, but if you're making a ground connection for a braided wire sleeve for example, then you might benefit from spreading the solder a little further to give you a bit more working surface area like the photo example below. If you look at what would be the neck volume pot (top right pot in this image) the area above lug 1 on the pot has been pre-tinned ready for a braided wire ground connection.
I then repeat the process for each of the planned ground connections which on this configuration will be one ground for the pickup, one ground for the switch wire and one ground for the bridge ground wire

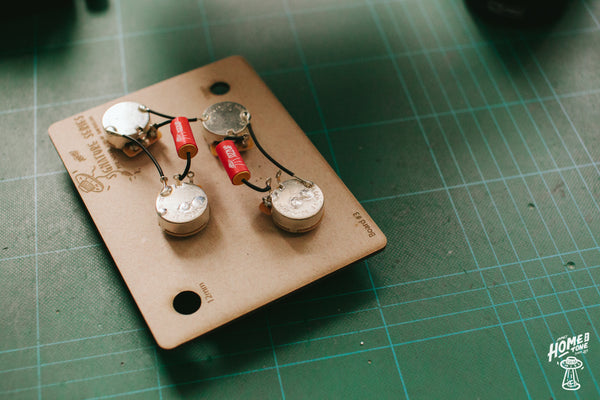
Doing all of this whilst the harness is out of the guitar should hopefully make the process a little easier and less fiddly for you. With that done, we can move back over to the guitar.
I try to do the majority of the work out of the guitar, so providing the wire lengths allow for this of course, I place some cloths or some form of protection of the guitar's finish like so.
If your wires from the switch or pickups aren't long enough to do this, then feel free to follow the same process as shown here but within the cavity.
You could start with either pot wires really, for example sake I picked the bridge pickup and switch wires to begin with. Both are traditional braided 2 conductor wire, but if you have 4 conductor pickup wires I'll cover that shortly with the neck pickup on my example.
So, starting with the wire coming from the switch, which I labelled up earlier to make my life a bit easier identifying them!
Push back some of the braided sleeve, along with some of the central cloth insulation to reveal the central core stranded wire. I then tin the wire end ready to make my solder connection. The wire from the switch goes to lug 2, the output/sweeper of the volume pot.

You can get soldering 'helping hands' etc but to be honest, a lot of them are more trouble than they're worth. I have some really substantial helping hand clips now which can be useful for certain tasks, but truth be told, just weighting the wire in question down can be enough to make your quick solder connection. Like above! Just using my long nose pliers to weight the wire down. 
Warm the joint, and flow some solder to make your connection. Be sure not to be impatient here and quickly move or touch the wire. You could cause a bad solder joint by doing so, so just leave it a moment to cool then move onto the next connection.
The next will be your ground connection, of which is done via the outer metal braided portion of the wire on this example. As we have tinned the pot casing this should be nice and easy to do. Again, warm up the joint and flow some solder onto the braid and casing. I tend to do a little either side of the braid/wire.

With that nice and secure and cooled off (I recommend giving the pot casing a little while here to full cool off too) and onto the pickup wire. The central core or 'hot' wire from your pickup will be going to lug 1 on the pot, with on this occasion, the outer braid being soldered to ground much like the switch wire. 
Tin the central core wire, then place it in lug 1, secure the wire, warm the joint and flow some solder to make your connection.
With that complete, repeat the ground connection process like your switch wire by warming the joint and flowing some solder onto the braid and pot casing to secure the ground wire.
We've now finished up everything on the bridge volume pot, so we can move onto the neck volume pot.
Here my switch wire is the very same braided wire type, so again, repeat the same process as per the bridge volume pot, remembering that your switch wire goes to lug 2.
For the neck pickup I am sharing the process for a 4 conductor wire humbucker. This particular one is a Iron Gear brand pickup where the red wire is our main hot signal, and the black and 'bare' wires are ground. But we also have a white and green wire, these are the 'series link' wires which could be used for coil split wiring for example. As this harness is a traditional wiring style with no additional switching options, we need to twist those two wires together (I also flow a little solder onto them to secure this connection) and either tape over them so they don't contact anything or some heat shrink like I am going to do below.
Unfortunately each pickup manufacturer uses their own colour coding for 4 conductor wiring, so what I might have here for an Iron Gear pickup will likely not be the same for the pickup brand you have. So the best recommendation I have here is refer to the pickup makers colour coding reference diagram to ensure you know which wire is which.

With the series link wires prepped and out of the way, let's move onto the main connections. Now this essentially follows the same rules as the 2 conductor pickup wire type now, with the hot wire heading to lug 1 on the volume pot, and the ground wire(s) being soldered to ground/pot casing.

Now, all being well the next connection will be our last solder joint of the install, our bridge ground wire. This simply gets soldered to the back of one of the pot casings, I have chosen the neck volume pot on this occasion.

There we have it! Let's get this in the guitar and tested. I remove the pots from the template board, and carefully place the pots into the cavity. The locking/star washers here can drop out all over the place, so from habit I tend to place those in the cavity over the holes ready and simply push the pots through. Rather than trying to hold the washers in place on the pot whilst squeezing it all into the cavity. No one needs that kind of hassle!


Now careful turn the guitar over, or on it's side, and fit the dress washers and mounting nuts to secure the pots.
Now, a tech tip here which I highly recommend as I see it many times where wires get stretched or pots are all twisted in the cavity pressed against the cavity wall etc. Tighten up the pot mounting nut whilst holding the pot in position with your other hand, if you struggle on your own feel free to ask someone to help. 

A simple trick but really helps reduce the risk of damaging any components, but also keeps things nice and lined up/neat within the cavity too!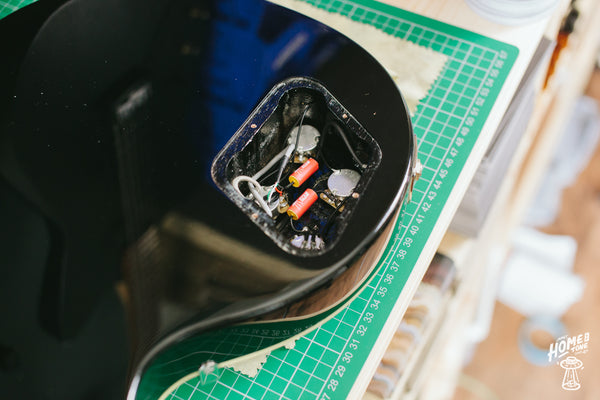
With everything mounted up, use this opportunity to glance around the wiring and ensure you're happy with all of the solder connections, and also that no wires are touching things they should causing ground faults etc. I tend to tuck excess wires out of the way to neaten things up but to also reduce the risk of wires touching things they shouldn't.
Now ready to tap test! This is a good way to check everything is working as it should be before string up of finishing mounting everything. Simply plug the guitar into your amp, grab a screwdriver and tap the pole pieces of each pickup across the 3 pickup positions on the selector switch and checking the volume & tone pots do their jobs. You should be able to notice if there's any bad ground hum noises, or signal issues at this stage which you can then go onto trouble shoot if there happens to be. But if you've been careful and methodical with your install then chances are it will be plain sailing from here. There are some handy pointers to trouble shooting in my main harness install guide which is on the wiring diagrams page here on the website. I urge every customer to read that before getting started. 

With everything checked, I then finish up the hardware by installing the control knobs and back plates. The control knob install isn't something to overlook, and I highly recommend doing this with the back plates still off as you can support the pot casing whilst pushing the control knobs on to ensure no damage is caused by incorrect adjustment.
So you'll likely notice that the split shaft pot shafts are somewhat adjustable and feature 24 splines. So ensure your control knobs are suited to imperial pots with 5.95mm 24 splines.
I first test fit the control knob, it may well push straight on with ease, but if you find it at all difficult to push on, stop right there! Don't force on the control knob as it can push the pot shaft right through the pot casing and destroy the pot. Really wouldn't want that to happen after all of that working making and installing the harness!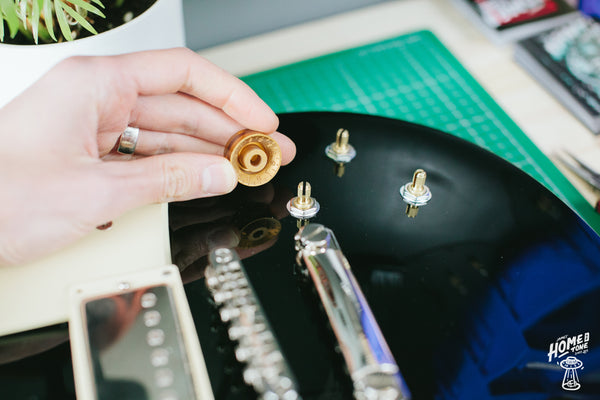
If it was difficult to fit, remove the control knob and grab some pliers. With the pliers gently squeeze the adjustable split shaft together and try again. Repeat this process until you find a perfect fit. The control knob should push on pretty easily but grip the shaft enough that it doesn't fall off.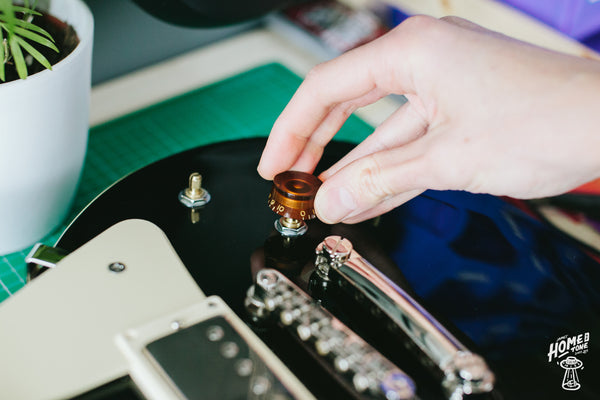

With the shaft adjusted, support the pot casing and push fit your control knobs.

Repeat the process for each pot/knob!
Finish up by fitting your back plates and stringing up!

Setting pickup heights -
Now this can be somewhat personal preference, a good starting point is to fret the low and high E strings at the very last fret and measure between the top of the pole piece to the bottom of the string. I usually start with the neck pickup as that tends to be the lower output pickup so dialing it that one first to your preference is a good starting point. I initially start with a 2mm measurement between the fretted bottom of string and the pole piece on both bass and treble sides. Then refine from there until I find a balance of tone and volume that suits my ear or gets the best from the pickup. With that pickup set, I then do the same with the bridge pickup initially looking for a good match of volume/output as you switch between the two pickups. But you may wish for a different effect, so experiment until you find a height that suits you and your requirements.
